|
Monday 3/16: Today, Ivy, Audrey Sutton, and I all started a new lab. In this experiment, we are going to attempt to take the shell off an egg and make it bounce-able. To do this we each brought in one egg and put it in a beaker full of vinegar. Leaving the egg in the vinegar will "erode" the shell. As soon as the egg was submerged in the vinegar, bubbles started to form around the shell. We left the beaker undisturbed over night, and the next day they had all grown and their shells were starting to peel off. According to the lab instructions, we should leave the eggs here for 7 days, swirling around the vinegar occasionally. Tuesday 3/17: I went and checked on our eggs after one night, and pieces of the shell are already peeling off. The egg I used is brown, so you can easily see the shell disappearing. When the a piece of the shell peels off from the egg, it floats up to the top of the vinegar. One thing I noticed was that the egg also grew! It seems to be almost rubbery, like a bouncy ball. Hopefully the egg is actually becoming bouncy, so that when we test them, it won't break. Monday 3/23: All last week I continued to check on our eggs and swirl around the vinegar. Today when I went and checked on the eggs, they had all grew even more. The vinegar no longer completely covered the egg, so we added more and recovered the beaker. The shells were also almost fully peeled off. Tomorrow we will be taking the eggs out of the vinegar and testing if they bounce or break. Wednesday 3/25: Yesterday Audrey was sick again, so today we are testing the eggs. When we got to class, we set out a tray on the table and then put gloves on. Next we picked the eggs up out of the beakers and rinsed them off in the sink. Everything smelt like vinegar, so it was a little gross, but it was also fascinating to see an egg intact without its shell. I was able to gently squeeze the egg without it popping, because it had a skin surrounding it. This is the skin layer that's on the inside of an egg shell. The vinegar eroded the shell, but not the skin layer. After the egg was all rinsed off, we went over to the table and bounced our eggs. I bounced mine first, and sadly I dropped it from too high up, so it popped and splattered on the table. Next we tried Ivy's egg. It bounced for quite a while, but eventually popped. Then we tried Audrey's. Her egg bounced well too and we decided to film it in slow motion popping. After all the eggs were popped, we pitched the eggs and washed the beakers. The Science behind bouncing eggs:
First off, what is an eggshell made of? An eggshell consists of solid calcium carbonate crystals and is a semipermeable membrane, which means it can allow air and moisture to travel through the shell's pores. Calcium carbonate makes up more than 4% of the earth's crust and can be found in multiple types of stone, limes, snail shells, and in this case, eggshells. "Calcium carbonate is the active ingredient in agricultural lime, and is created when calcium ions in hard water react with carbonate ions creating limescale (Wikipedia)." When we put the eggs into vinegar, the calcium carbonate reacts with the vinegar. Eggshells are 1% magnesium carbonate, 1% calcium phosphate, 4% organic matter, and 94% calcium carbonate. Because of the high value of calcium carbonate in the eggshells, the vinegar is able to break down the shell. The acetic acid inside the vinegar is breaking down the shell's calcium carbonate crystals. When this reaction occurs, the calcium ions float away and the carbonate creates carbon dioxide, which are the bubbles floating off the egg; together they break down the eggshell. In order to allow our eggshell to fully breakdown, we left the eggs in the beakers for about a week. After the week was up, only the skin of the shell, or membrane remained with the egg yolk inside it. Reflection: Even though this experiment was fairly simple, I still found it very interesting. I was not expecting the eggshell to partially peel of in one night. The shell continued to peel each day and it amazed me that just vinegar could do that. I also really enjoyed working with Ivy and Audrey on this lab. We didn't have to do all that much complicated steps, but I really feel like we worked well together. From the very start we had good communication skills. We all got on computers and researched and planned our proposal together. We also brought in our materials on time so we could work right away. Overall, I would definitely work with this group of people again. I don't know that I would do the egg lab again, but I am interested in experimenting with other objects that might dissolve in vinegar.
0 Comments
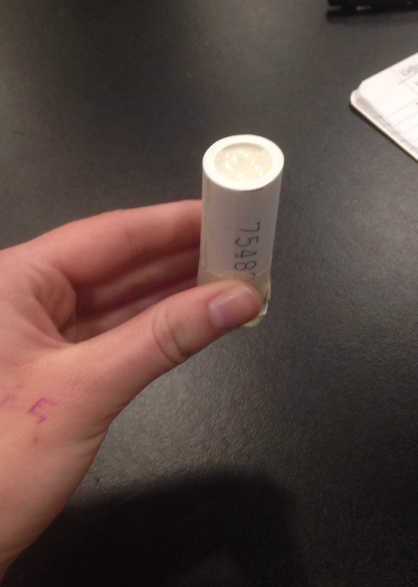
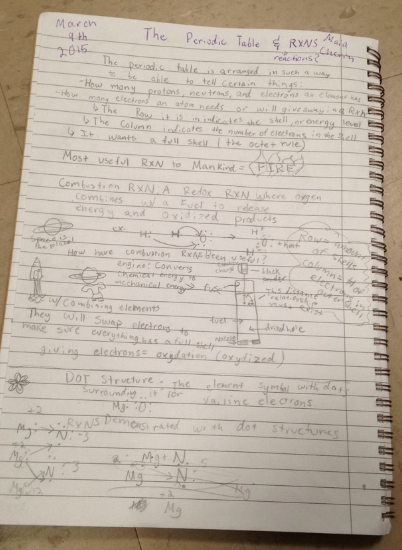
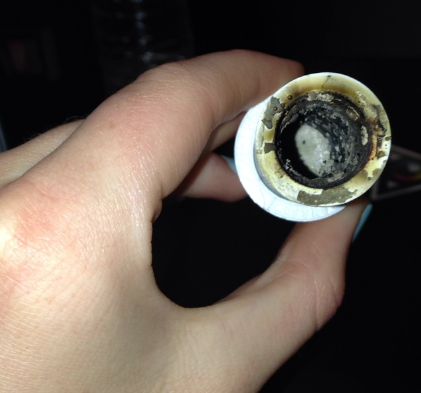
Monday: In today's class we learned about how you can read a periodic table and started the process of building rocket engines. The two most important pieces I took away from the lesson on the periodic table was that the row an element is in indicates the amount of shells around the element and the energy level that it has. The column an element is in tells you how many electrons are in the outer most shell. By looking at the periodic table you can also see how many electrons, protons, and neutrons an element has, as well as it's atomic mass and number (mentioned in magnesium lab post). For example, Cesium would have 6 shells and 1 electron in the outer shell. The shells of an element are essentially what protect the nucleus and contain electrons that orbit around the nucleus. We also learned about how to draw the dot structure of an element, which displays the number of electrons in the outer shell. For example, if you were to draw the dot structure of an element like Beryllium, you would write the element name with two dots next to it, Be: This shows that there are two electrons in the outer shell. According to the Octet Rule, every element wants a full shell, meaning that they gain or lose electrons in order to attain the electron configuration of the nearest noble gas. When elements give electrons like this, they are going through the process of oxidation and become oxidized. One example of something releasing oxidized products is through a rocket engine. During today's lesson, we also learned a lot of information on RXNs, or reactions, and how they factor into rockets. First off, a reaction is whenever two or more molecules react and change in order to break a bond between atoms and form new molecules. One of the most useful and famous reactions to mankind is a combustion reaction. A combustion reaction is essentially when oxygen combines with another element and creates energy in heat and light form. An example of this would be in what our rockets contain, 65% Nitrate, 35% fuel. Our rocket fuel contains sorbitol sugar, which burns easily. When these elements bond it creates energy, aka fire. Fire is formed by oxygen taking electrons and creating heat. This is done by when atoms form a new bond, and their reaction releases energy. This energy is what then powers the rocket. All of this energy happens inside the engines we are creating. In our rocket engines there are the following components: black powder, a fuse, fuel, a drilled hole, and nozzle. In the area where the black powder sits, there is an electron charge occurring. As our rockets are in the process of launching, the engine will convert chemical energy to mechanical energy in order to power the rocket. As we began the process of making our rocket engines, we first got a small pvc pipe (about 2 in. long) and taped off one end of it. After this, we poured our fuel mixture into the pipe, and sealed it with cement. Later on this week, we will be testing the engines. Below is a picture of my group's rocket engine so far, and one page of the notes I took.
Thursday: It's testing day! Today in class we tested our rocket engines that we created on Monday. Before testing the engines, Andrew drilled a hole in them and attached a string going through the middle. After all the engines were prepared, we headed outside to the back lawn. Andrew had an apparatus set up to hold the engines in place as they were lit. Our rocket engine was the first to be tested. It was placed in the apparatus and lit. Once the string caught on fire, the heat traveled up it and slowly smoke was released. The engine made a "pssssst!" noise and released a large stream of smoke. After watching everyone else's rocket engine tests, I would say that ours was definitely the weakest. The noise it made wasn't very loud, and the power of the stream of smoke was not powerful either. Reflection: Overall, I found this rocket engine lab very interesting. When we first started, I was glad to be working with a new group of people. It made the lab a little more fun and I got to have more experience with working with others. I also learned a lot about how rockets work through writing this blog post. Though I did work with new people, we didn't do all that much on the actual rocket engine, as it had fairly simple steps. Because of this, I can't really evaluate how well we worked together, but I know next time I do a lab, I would like to work with some of these people.
Tuesday: In today's chemistry class, Audrey Sutton, Morgan Hayman, and I started the process of making our crayon candles. Morgan brought in a large block of wax, which we grated into small pieces all of class. It took a really long time to grate the wax because it was very strenuous. Tomorrow we will begin the process of melting the wax and actually creating the candles. Wednesday: Today we officially began the crayon candle making process. Yesterday we shredded the wax and put it aside in a container, along with some broken up crayons. To start creating the candles, we got a cooking pot and filled it about an inch from the top with water. and placed it on a hot plate. Then we took a glass liquid measuring cup and placed it in the water. We then filled the majority of the measuring cup with wax shreds, a few pieces of crayons, and either lavender or peppermint oil, depending on who was making the candle. Once the hot plate was on, and the water started steaming, we slowly stirred the wax with two chopsticks. The wax started melting and turned the color of the crayons. While the wax was melting, I glued a wick into the jar that I was using for my candle and put some confetti at the bottom. After all the wax was all the way melted, we poured it into the jar of our choice and added more confetti to the top. We made about 5 of these, one of which was a cone shape. Tomorrow we are going to check back on the candles to see how they dried. The Science Behind Crayon Candles:
What are the chemical properties of wax? The wax we melted for our candles was one of the most common waxes used in candle making today; paraffin wax. Paraffin wax is made from carbon and hydrogen and hydrocarbon molecules, which are also called alkanes. Does wax change on a molecular level? When the heat from the flame occurs, the bonds that hold the wax together are repositioned. Once the candle is done burning and the flame is out, the wax cools and can reform it's bond. Candles also change on a molecular level through the phases of matter. When you first start out with a candle, the wax is in solid form, then as you burn the candle and the wax melts, it changes into a liquid. When the candle is in solid form, its molecules are in a fixed position, but can still vibrate. Once it changes to a liquid, the molecules are still slightly tight, but can slide around. When we put the pieces of wax in the glass measuring cup, it was in solid form, but once the wax melted and was ready to pour, it was in liquid form. After the wax was poured into the jar of our choice, it solidified, causing it's molecules to become tight again. If I were to burn my candle I created, carbon dioxide (made from carbon and oxygen) is emitted into the air. The wax goes from being in liquid form, to gas form as it is burned. Candles also release water vapor, made from hydrogen and oxygen. This water vapor forms around the inside of the jar or container the candle is in. Overall Reflection: I had a great experience with making candles. My group members, Morgan and Audrey were really helpful and I feel like we had great communication skills throughout the experiment process. This lab was very simple, and I learned a lot about the science of candles that I didn't know before. One thing that I would do next time, is find better materials. We had a really hard time grating the wax, and I would've liked to have access to already grated wax. I think it would've been an improvement to the candles if we would have used better materials. Today at lunch Audrey Sutton and I worked with our teacher, Andrew, at lunch to develop our photos. When I first got to the chemistry room, I covered the window on the door with tin foil and put an object at the bottom of the door to block out the light so that our photos would not be exposed to light and unable to develop. Once all the light was blocked out we set up our three trays with the developer, stop bath, and fixer. Then we put on our gloves and flipped the light switch off. Next we took our photos (one at a time) and slid them into the developer. The photos started to turn a blackish gray and then we put them into the stop bath for about a minute. After being in the stop bath, we put the photos in the fixer, where they soaked for a few minutes, then Andrew rinsed the photos in the sink. Sadly, the photos didn't develop into the pictures that we took, instead they ended up looking like clouds. We think we might have exposed the photos for too long. On the tutorial we looked at online, it said to expose for 30 sec to 4 minutes, so Audrey and I each exposed our photos for 4-5 minutes. Later on we heard that the recommended exposure was about 30 seconds. If we were to do this again, we would expose for a much lower amount of time.
The Science Behind Taking/Developing Photos: Taking the Pictures: A pinhole camera is one of the simplest cameras there is. It consists of only a box, pinhole, shutter, and photo paper. But how can you take a picture with a box? When we took our cameras outside to take pictures, we set our cameras in a fixed position, and opened the shutter flap. When the flap was opened, the image was inverted and reversed, but each part of the scenery we were shooting emitted light through the pinhole and onto the photo paper. When all these points of light hit the photo paper inside the camera at the same time, it creates an image. Having the pinhole as our lens takes every point of light outside the camera, and forces it onto the photo paper. The reason the light is able to "stain" the paper is because it is coated with a light sensitive chemical called emulsion. The emulsion has small grains called halides which are typically made up of Silver Bromide, Silver Iodide or Silver Chloride. Developing the Pictures: In order to develop pictures, there are 3 chemicals involved, and you must be in a dark room where the only source of brightness is from a red light. One of the chemicals used in the process of developing photos is ironically called "developer". When you lay a photo in a tray of developer, it's main job is to be a reducing agent, meaning that it reduces a chemical compound to a less complicated chemical. When we opened the flaps of our pin hole cameras earlier, a chemical change occurred to the photo paper because it absorbed the energy from the light into the silver salts (The chemicals in emulsion). The developer causes these silver salts to change to a metallic silver, showing the outline of the objects in the view of your camera when the picture was taken. When you dip your photo into the developer, it will start to show signs of an image forming fairly quickly, depending on the exposure time. Because of this the next chemical we dip our photos in is called stop bath. When your photo begins to develop too fast, the entire photo will start to turn black, which is why we put it in the stop bath to discontinue the developing. When you dip the picture into stop bath, it neutralizes the developer, causing the photo to essentially "freeze" in its place. After being soaked in the stop bath for a few minutes, the photo is then placed in a chemical called fixer. Fixer is a mixture of chemicals that removes any leftover silver halide from the picture. This basically sets the image and prevents it from being affected anymore by light. Once the image has been put in fixer, you have finalized the image, preventing it from becoming any darker from the silver halide, or from being damaged by light. Final Reflection: Overall, this pinhole project was a great experience for me. I first started out being passionate about the experiment, and kept that mindset throughout. I picked something I was really interested in, and learned a lot from it. I had practice with measurement when building my camera, patience when loading with photo paper, and a knowledge gain when developing. I have never done something like this before, and think I learned so much from it because I was so eager throughout the process. My partner for the project was great as well. We worked efficiently and supported each other when needed. If I were to do this experiment again, I would try to plan out our time better. We sometimes found ourselves waiting for materials, or the right time to move forward with the next stage of the experiment. I feel like I should never have an excuse for "waiting", and that is why next time I want to plan out my time better when we pitch our idea. |
AuthorWrite something about yourself. No need to be fancy, just an overview. CategoriesArchives |

 RSS Feed
